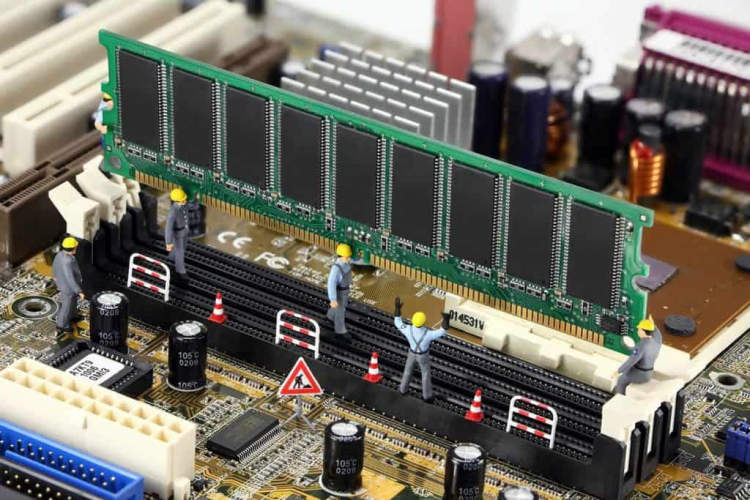
Are you looking to upgrade your computer’s performance? One way to do that is by installing additional RAM. In this article, we will guide you through the process of installing RAM in a computer, step by step.
Whether you are a novice or experienced computer user, learning how to install RAM can be a valuable skill. By following this guide, you’ll be able to boost your computer’s speed and overall performance in no time.
Checking System Compatibility
Before installing RAM in a computer, it’s essential to ensure that the new memory modules are compatible with your system. Here are the steps to check system compatibility:
- Refer to the computer’s manual or manufacturer’s website: It’s recommended to consult the documentation provided by the computer manufacturer or visit their website for information on compatible RAM types and specifications for your specific model.
- Identify the current RAM type: Check the type and speed of the existing RAM modules installed on your computer. This information can usually be found in the system’s BIOS or through software utilities designed for system analysis.
- Check for available RAM slots: Determine the number of available RAM slots on your motherboard. This will determine the maximum capacity and configuration of RAM that can be installed.
- Consider the operating system and architecture: Different versions of operating systems have limitations on the maximum amount of RAM they can support. Ensure that your operating system can handle the desired RAM capacity.
- Check the maximum supported RAM capacity: Find out the maximum amount of RAM your system can support. This information is usually available in the computer’s manual or on the manufacturer’s website.
- Consider compatibility with other hardware components: Some motherboards have specific requirements for RAM compatibility, such as voltage or module height. Check if your desired RAM modules meet these specifications.
- Verify compatibility with your usage requirements: Consider your specific needs and usage patterns. If you use resource-intensive applications or engage in tasks requiring large amounts of memory, ensure that the selected RAM modules meet those requirements.
Step-by-Step Guide to Installing RAM

Are you looking to upgrade the memory on your computer? Installing RAM (Random Access Memory) is a simple and effective way to improve your computer’s performance. Follow these step-by-step instructions to install RAM in your computer:
Step 1: Check compatibility
Before purchasing new RAM, it is important to check the compatibility with your computer. Refer to your computer’s user manual or visit the manufacturer’s website to find out the type and speed of RAM supported by your system.
Step 2: Gather necessary tools
Make sure you have all the necessary tools before starting the installation process. You will need a screwdriver, an antistatic wrist strap (optional but recommended), and of course, the new RAM modules.
Step 3: Power off and unplug your computer
Before working on any internal components of your computer, ensure that it is completely powered off and unplugged from the electrical outlet. This will prevent any electrical shock or damage to the components.
Step 4: Locate the RAM slots
Open your computer’s case and locate the RAM slots. These slots are usually long and narrow, and they are typically located near the CPU. Refer to your computer’s manual if you are having trouble finding them.
Step 5: Remove old RAM (if applicable)
If your computer already has RAM installed, you will need to remove the old modules before installing new ones. Gently press the clips or levers on the sides of the RAM slots to release the old modules, then carefully remove them.
Step 6: Insert the new RAM modules
Take your new RAM modules and align them with the slots. Ensure that the notch on the module matches the slot key, then firmly press down until the clips or levers snap into place. The module should be securely seated in the slot.
Step 7: Close the computer case
Once the new RAM is installed, close your computer’s case and secure it with the screws. Make sure everything is fastened properly to avoid any loose connections or rattling components.
Step 8: Power on your computer
Plug your computer back in and power it on. Your computer should automatically detect the new RAM and adjust its settings accordingly. You can verify the installation by checking your computer’s system information or using diagnostic software.
Now that you have successfully installed new RAM in your computer, you should experience improved performance and smoother multitasking. Enjoy your upgraded system!
Conclusion
Properly installing RAM in a computer is an important task that can significantly improve the performance of the system. By following the correct steps and precautions, users can easily upgrade the RAM on their computers without any hassle. Remember to identify the compatible RAM type for your system, power off and unplug the computer, open the case and locate the RAM slots, align the memory module correctly, and firmly press it in until it clicks into place. Finally, ensure that the RAM is detected by the computer and properly recognized in the system settings. With these steps in mind, users can confidently upgrade their computer’s RAM and enjoy faster and more efficient performance.
In conclusion, installing RAM in a computer is a straightforward process that can greatly enhance the speed and overall performance of the system. With the appropriate steps and precautions, users can easily upgrade their RAM, even if they have limited technical expertise. The benefits of installing RAM include faster multitasking, smoother program execution, and improved overall system responsiveness. Whether you are a gamer, a professional in need of a high-performing workstation, or a casual user, upgrading your computer’s RAM can bring noticeable improvements. So go ahead, follow the installation process, and experience the power of increased RAM capacity in your computer.

0 Komentar untuk "How to Install RAM in a Computer?"